

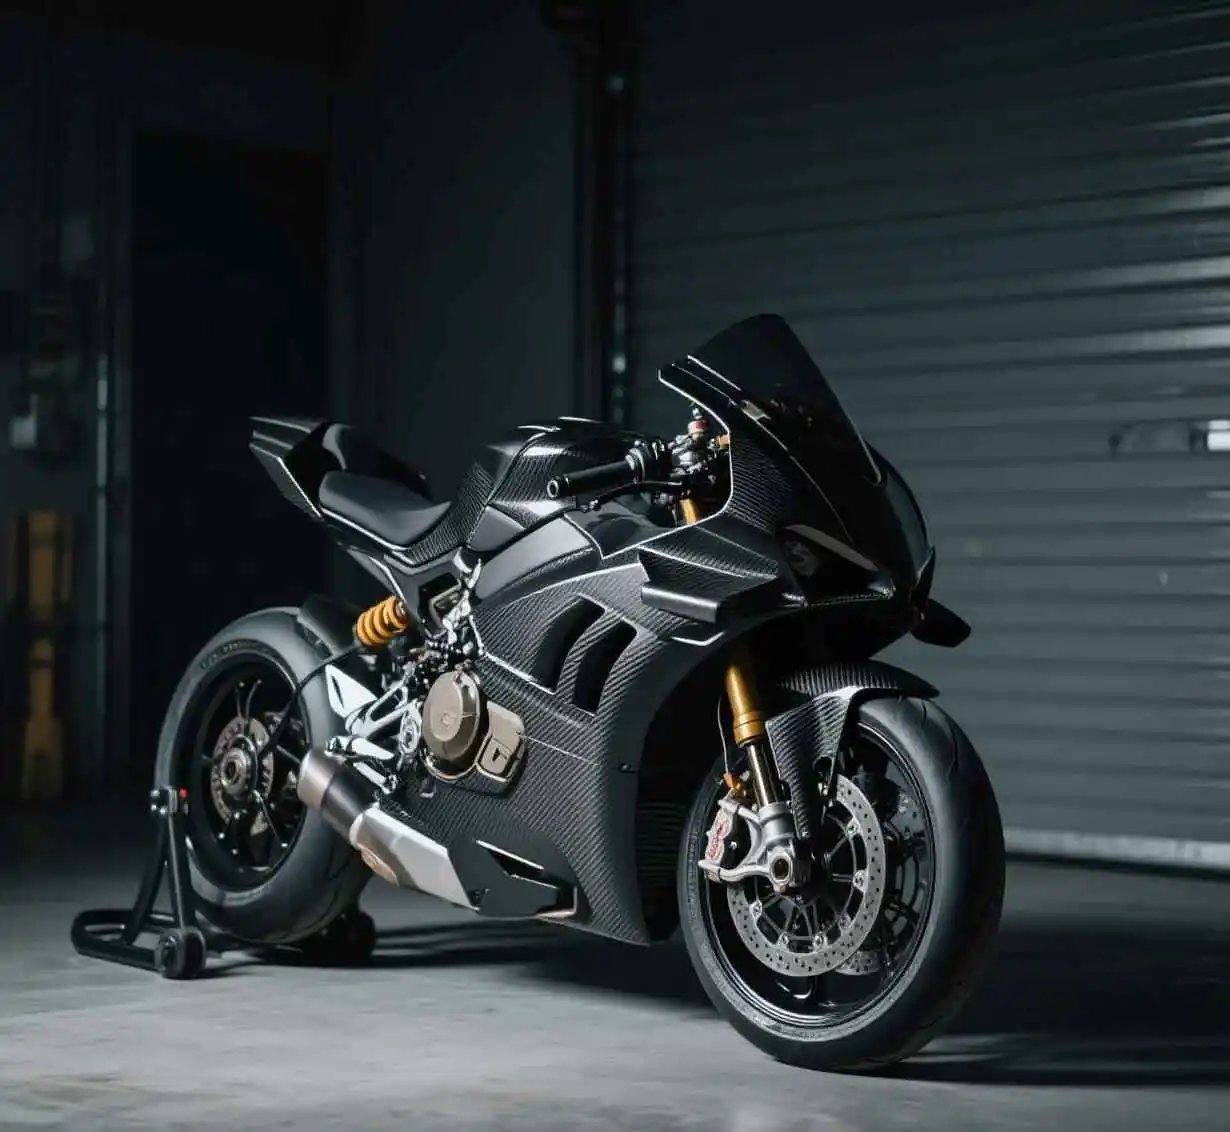
Создание мотоцикла на заказ выходит за рамки простой сборки и становится личным заявлением. Для энтузиастов, стремящихся к максимальной производительности и убийственной внешности, DIY Детали из углеродного волокна предлагают увлекательный путь. Это руководство освещает вам путь от базовых материалов до потрясающих готовых компонентов. С помощью этих передовых материалов вы сможете по-настоящему преобразить свой автомобиль. Представьте себе удовольствие от создания чего-то по-настоящему уникального.
Почему стоит выбрать детали из углеродного волокна DIY для кастомизации мотоцикла?
Так зачем же погружаться в создание собственного Детали из углеродного волокна? Преимущества довольно убедительны для любого любителя велосипедов. Прежде всего, это вес или, скорее, его отсутствие. Углеродное волокно поразительно легкое, что значительно увеличивает ускорение и маневренность вашего мотоцикла. Далее, этот материал обладает невероятной прочностью и долговечностью, намного превосходящей пластик и даже некоторые металлы.
Кроме того, эстетическая привлекательность не вызывает сомнений. Настоящие листы углеродного волокна обеспечивают гладкий высокотехнологичный внешний вид, который так нравится многим гонщикам. Забудьте о хлипких листы из искусственного углеродного волокна или неубедительно имитация листов углеродного волокна потому что подлинные вещи имеют огромное значение.
Ссылки:
1. Как резать трубки из углеродного волокна: Ключ к допуску и отношениям с клиентами
2.Как мы помогли нашему клиенту решить проблемы с продукцией с помощью наших трубок из углеродного волокна?
3.Building Your Ultimate Lightweight Drone Frame: Пошаговое руководство по созданию каркаса из углеродного волокна
4.Как улучшить качество поверхности углепластиковых труб большого диаметра
5.Как изготавливаются листы из углеродного волокна?
Понимание углеродного волокна: От сырых листов до готовых деталей
Прежде чем пачкать руки, полезно разобраться в самом материале. Углеродное волокно - это не просто что-то одно, это композит. Это означает, что в нем сочетаются различные материалы для достижения его звездных свойств.
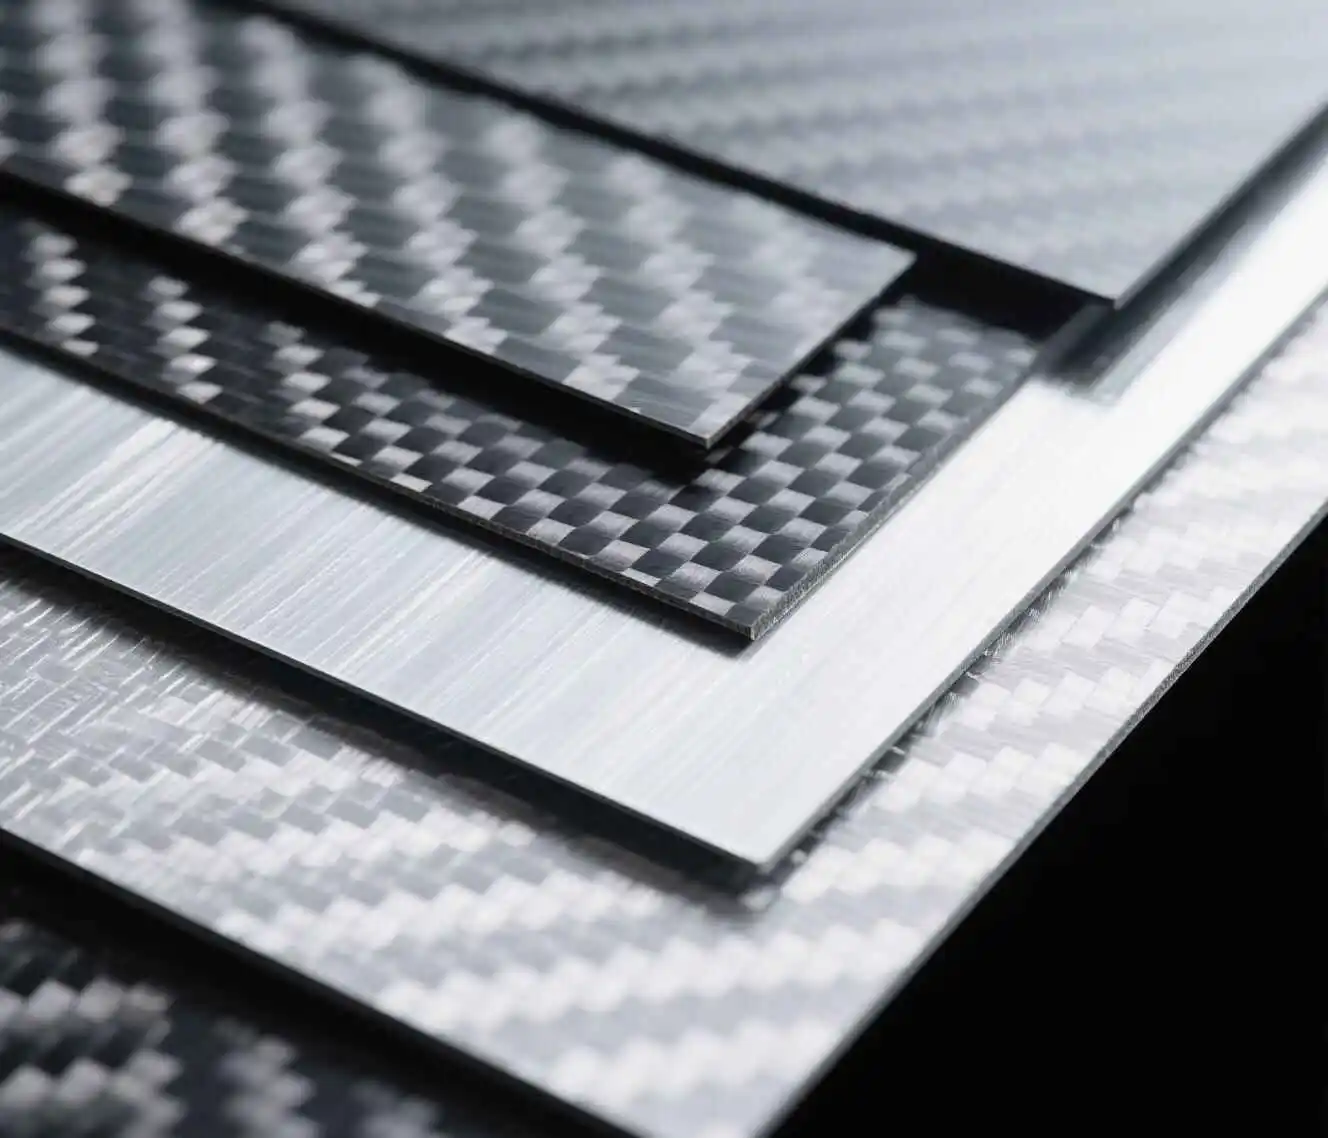
Что представляют собой листы из углеродного волокна?
В своей основе углеродное волокно представляет собой невероятно тонкие нити, состоящие из атомов углерода. Эти нити сплетаются в ткань, похожую на необработанные листы углеродного волокна. Эти листы становятся композитный лист из углеродного волокна при пропитке смолой, как правило, эпоксидной. Эта смола выступает в качестве связующего вещества, удерживающего волокна вместе и придающего конечной детали форму и жесткость.
Вы встретите такие термины, как ламинированный лист из углеродного волокна что означает несколько слоев углеродной ткани, соединенных вместе. Для тяжелых условий эксплуатации толстые листы углеродного волокна используются, обеспечивая значительную структурную целостность. Рисунок переплетения углеродной ткани (саржевый или полотняный) также способствует повышению прочности и визуальной текстуры. Многие строители предпочитают саржевое плетение за его классический вид.
Основные характеристики качественного материала из углеродного волокна
Качественный материал из углеродного волокна обладает фантастическим набором характеристик. Самой известной его особенностью, безусловно, является высокое соотношение прочности и веса. Этот материал прочнее стали и при этом гораздо легче. Таким образом, ваш мотоцикл получает уменьшенную массу и улучшенную прочность конструкции.
Кроме того, углеродное волокно великолепно противостоит коррозии. В отличие от металлов, он не ржавеет и не разрушается под воздействием окружающей среды. Он также достаточно хорошо переносит нагрев, хотя экстремальные температуры вблизи выхлопных труб могут потребовать особого внимания или тепловых экранов. Пожалуй, самое важное для работы на заказ - углеродное волокно хорошо поддается формовке, что позволяет создавать сложные формы для поистине уникальных изделий. Детали из углеродного волокна.
Начало работы: Набор инструментов и материалов для изготовления деталей из углеродного волокна своими руками
Для того чтобы приступить к изготовлению углепластика своими руками, необходимо собрать соответствующие инструменты и материалы. Правильная подготовка предотвратит множество головных болей в дальнейшем. Вам нужен хороший материал, чтобы сделать хороший материал.
Основные материалы: Поиск источников углеродного волокна
Поиск качества настоящие листы углеродного волокна это ваш первый важный шаг. Многочисленные онлайн-поставщики обслуживают как любителей, так и профессионалов. Вы должны выбрать правильную толщину и плетение для вашего проекта. Например толстые листы углеродного волокна подходят для таких конструктивных элементов, как кронштейны или подрамники. Более тонкие листы хорошо подходят для эстетических деталей, таких как вставки в обтекатели или небольшие крышки.
Новички обычно начинают с мокрой укладки, используя необработанные листы углеродного волокна и отдельная система жидких смол. Препрег (предварительно пропитанное) углеродное волокно обеспечивает более высокие характеристики, но требует более сложных методов отверждения, таких как автоклав, что не под силу большинству домашних устройств. Обратите внимание на тип смолы: эпоксидные смолы отличаются прочностью и адгезией.
Основные инструменты для изготовления деталей мотоцикла
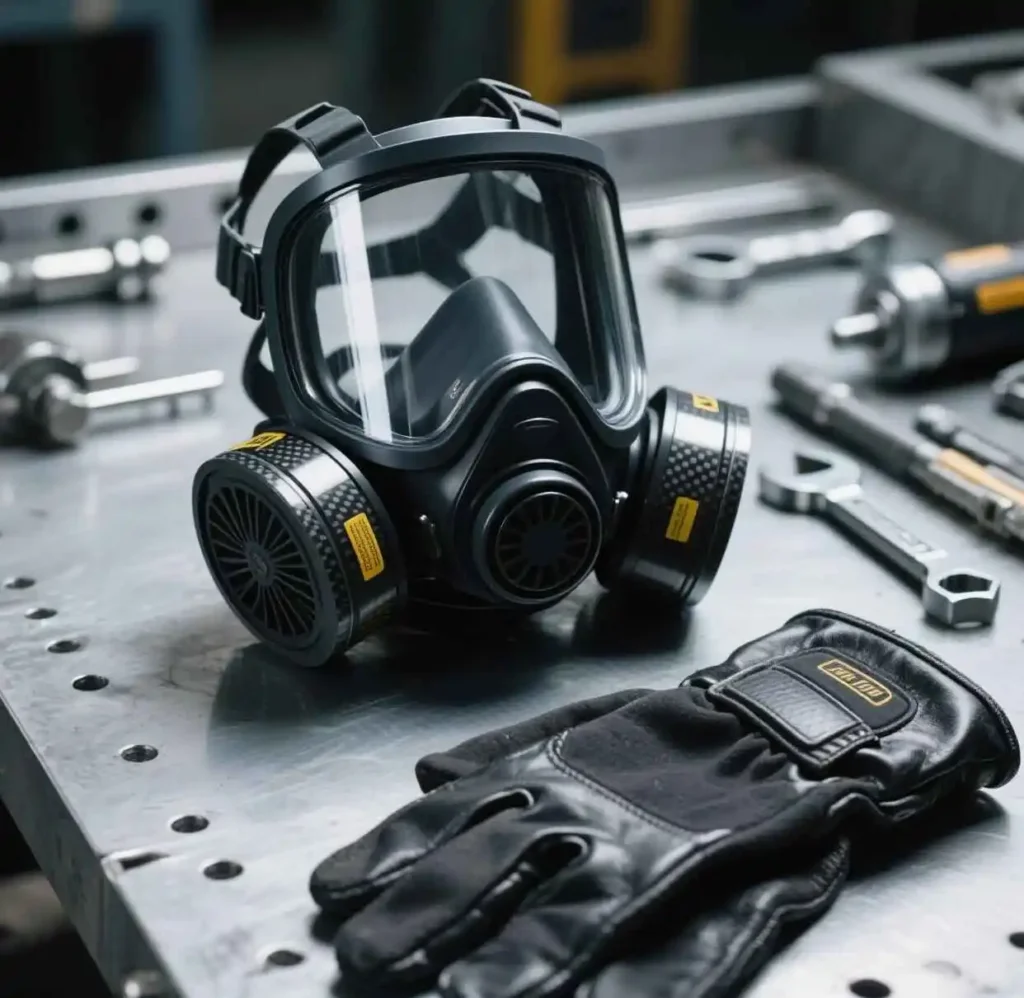
Защитное снаряжение не подлежит сомнению. Всегда используйте качественный респиратор, чтобы избежать вдыхания угольной пыли или паров смолы. Нитриловые перчатки защитят вашу кожу, а защитные очки - глаза. Для самого процесса изготовления вам понадобятся материалы для создания формы. Это может быть глина для лепки, пенопласт для скульптуры, дерево или даже 3D-печатный пластик.
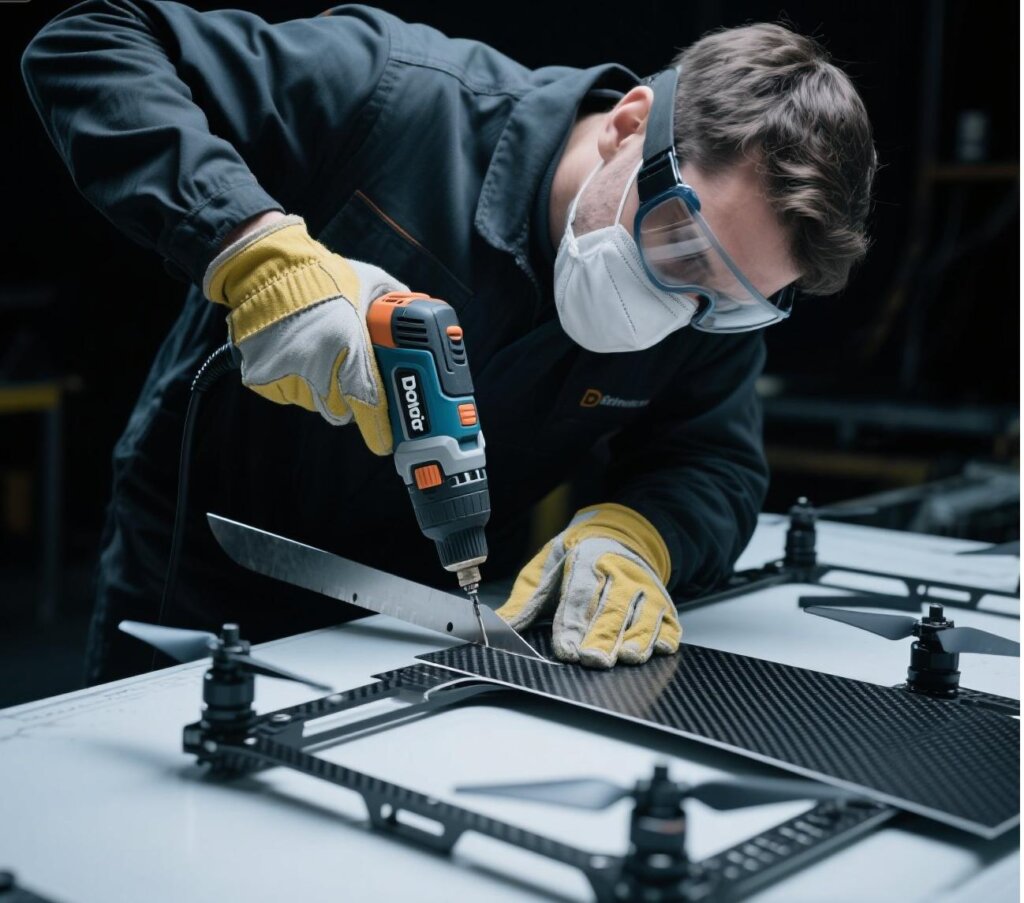
Хороший разделительный агент необходим для того, чтобы ваша деталь не приклеилась к форме надолго. Для нанесения эпоксидной смолы вам понадобятся стаканчики для перемешивания, палочки для размешивания и кисти или валики. Сквиджи помогают пропитать углеродную ткань и удалить излишки смолы и пузырьки воздуха. В то время как дополнительные вакуумные пакеты (вакуумный насос, пленка, сапун) значительно улучшают качество деталей. Для резка листа углеродного волокна Как до, так и после полимеризации необходимы такие инструменты, как Dremel с алмазным диском, угловая шлифовальная машина с отрезным диском или специализированные ножницы для углеродного волокна. Наконец, набор наждачных бумаг и полировочных составов придаст вашему Детали из углеродного волокна профессиональный блеск.
Как сделать детали из углеродного волокна своими руками: Пошаговое руководство для начинающих
Когда материалы и инструменты готовы, настало время для самого интересного: создания вашего Детали из углеродного волокна. Терпение и внимание к деталям - ваши лучшие союзники в этом процессе. Для достижения успеха внимательно следуйте этим шагам.
Этап 1: Проектирование и создание пресс-формы
Качественная форма - основа отличной готовой детали. Для начальных проектов выбирайте простые формы. Плоские панели, небольшие крышки или базовые защитные элементы - отличные отправные точки. Вы можете вырезать формы из высокоплотного пенопласта, придать им форму из глины или даже спроектировать и напечатать на 3D-принтере для создания более сложных геометрических форм.
После того как базовая форма готова, ее поверхность необходимо тщательно подготовить. Отшлифуйте ее до идеальной гладкости, затем запечатайте подходящим герметиком, если материал пористый. После этого нанесите несколько слоев воска для снятия формы, полируя каждый слой. Наконец, распыляемый разделительный агент на основе ПВА может обеспечить дополнительный барьер для легкого удаления деталей.
Этап 2: Процесс наплавки - работа с листами углеродного волокна
Теперь наступает время работы с углеродным волокном. Начните с точного резка листа углеродного волокна секций, чтобы они соответствовали вашей форме. Планируйте ориентацию каждого слоя, так как направление волокон влияет на прочность. Затем тщательно смешайте эпоксидную смолу и отвердитель в соответствии с инструкциями производителя. Неправильное соотношение может привести к липкости деталей или снижению их прочности.
Если сначала нанести на форму тонкий слой геля, то можно получить превосходную поверхность, хотя для новичков этот шаг необязателен. Аккуратно уложите первый кусок необработанный лист углеродного волокна в форму. Аккуратно вдавите его во все контуры. Затем тщательно пропитайте углеродное волокно смешанной смолой с помощью кисти или валика. Это называется "смачиванием". Добавьте последующие слои ламинированный лист из углеродного волокна чтобы каждый слой был полностью смочен. С помощью скребка или валика тщательно удалите все пузырьки воздуха и излишки смолы между слоями. Этот шаг очень важен для получения прочной детали без пустот.
Этап 3: отверждение деталей из углеродного волокна
При правильном отверждении влажные слои превращаются в прочную твердую структуру. Условия отверждения имеют ключевое значение: большинство эпоксидных смол требуют определенного температурного режима и времени для полного отверждения. Обратитесь за этой информацией к спецификации поставщика смолы. Многие начинающие проекты могут отверждаться на воздухе при комнатной температуре, хотя это может занять 24-48 часов или больше.
Для улучшения результатов и ускорения отверждения некоторые мастера используют контролируемый источник тепла, например печь для отверждения или даже импровизированный обогреваемый шкаф. Всегда соблюдайте осторожность при применении тепла. Вакуумная упаковка, если вы выбрали этот путь, наносится перед отверждением. Вакуумное давление уплотняет ламинат, удаляя из него излишки смолы и воздуха, тем самым создавая более прочную и легкую конструкцию. Детали из углеродного волокна.
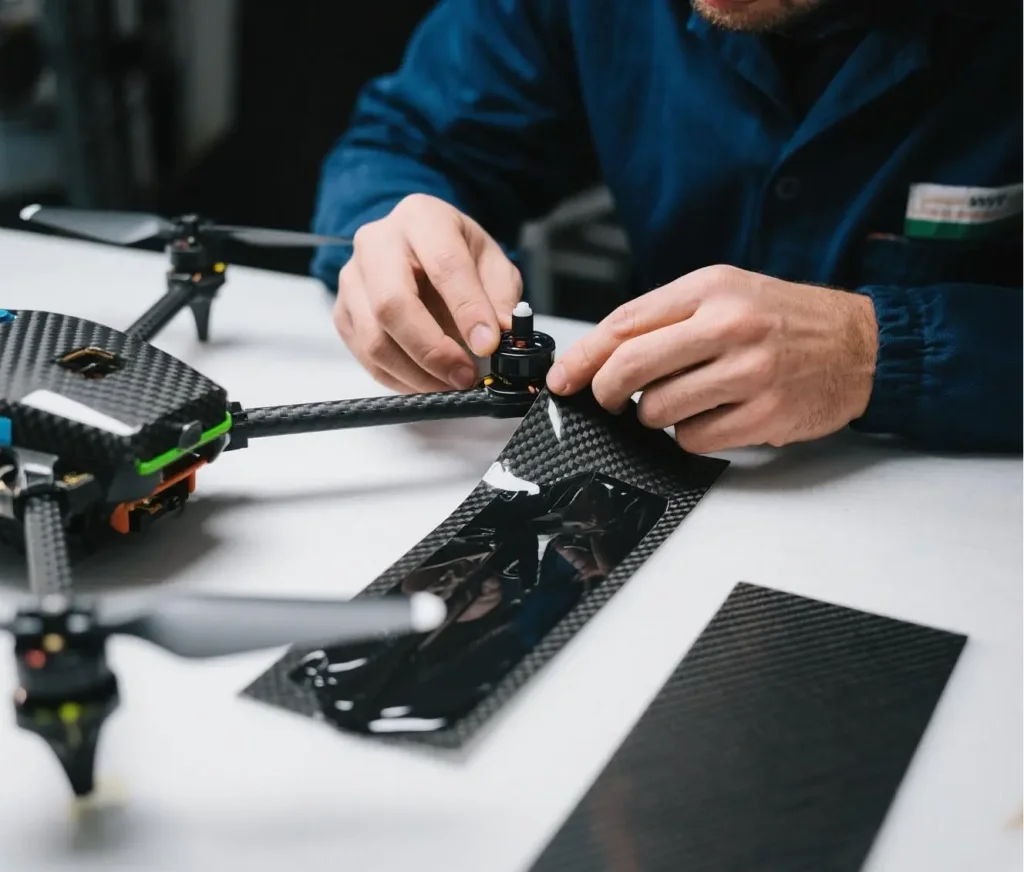
Этап 4: Формование и отделка деталей по индивидуальному заказу
По истечении времени полимеризации наступает момент истины: распаковка. Осторожно отделите ваш новый Детали из углеродного волокна из формы. Если подготовка формы была хорошей, она должна выйти без особых проблем. Иногда требуется осторожное надавливание или постукивание.
Затем вам нужно будет обрезать все излишки материала или неровные края. Процесс резка листа углеродного волокна После полимеризации требуется осторожность из-за пыли. Работайте с Dremel или угловой шлифовальной машиной в хорошо проветриваемом помещении в защитной экипировке. Влажная шлифовка во время резки поможет справиться с пылью. После обрезки начните шлифовать деталь, начиная с более грубых зерен и переходя к более мелким для получения гладкой поверхности. Наконец, вы можете отполировать углеродное волокно до блеска или нанести прозрачное покрытие, устойчивое к ультрафиолетовому излучению. Это прозрачное покрытие защищает смолу от пожелтения со временем и действительно делает переплетение этих настоящие листы углеродного волокна поп.
Продвинутые техники и рекомендации по изготовлению деталей из углеродного волокна для мотоциклов
Освоив базовые плоские панели и простые кривые, вы, возможно, захотите изучить более сложные техники. Они могут повысить уровень вашего DIY Детали из углеродного волокна на другой уровень. Такие методы часто требуют большей точности, а иногда и специального оборудования.
Исследование деталей с ЧПУ из углеродного волокна
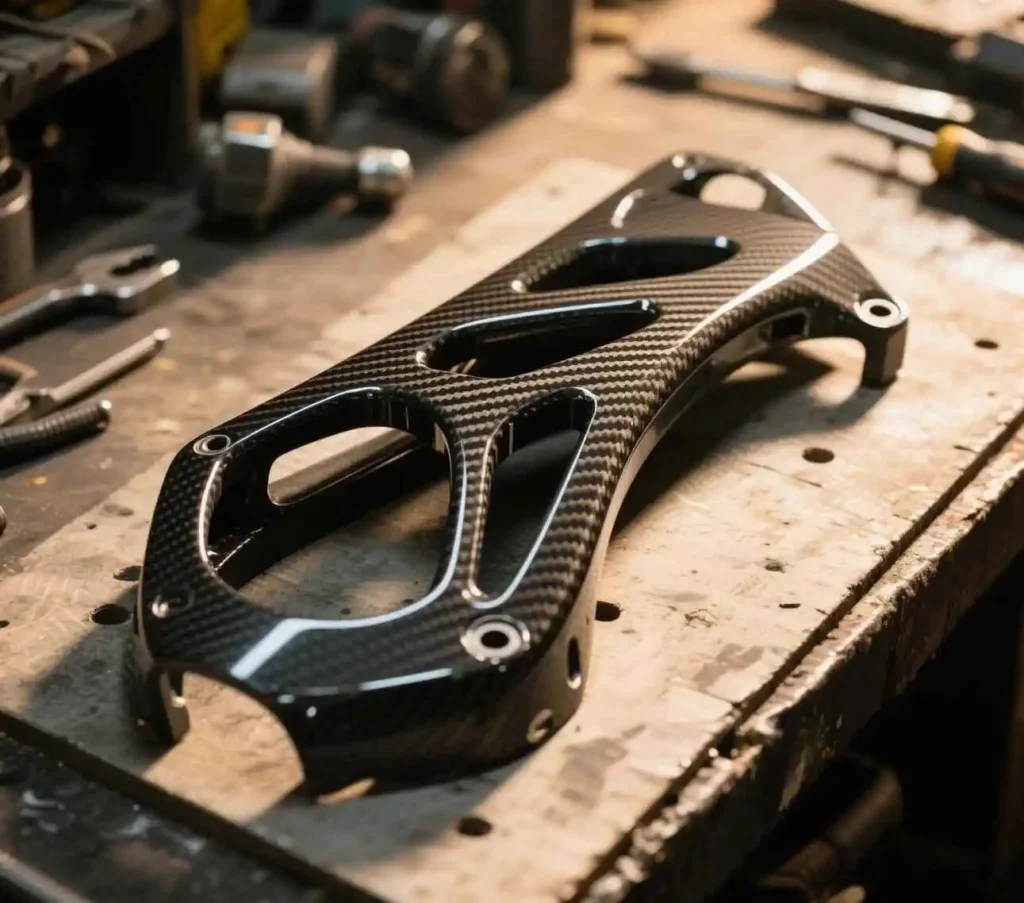
Хотя это руководство посвящено ручной укладке, стоит знать, что Детали с ЧПУ из углеродного волокна. Как правило, они изготавливаются из готовых цельных толстые листы углеродного волокна или блоков с помощью станков с числовым программным управлением (ЧПУ). Этот процесс субтрактивного производства позволяет создавать чрезвычайно точные и сложные конструкции, которые было бы трудно или невозможно выполнить только при ручной укладке.
Для энтузиастов DIY настольный фрезерный станок с ЧПУ может использоваться для создания высокоточных пресс-форм. Он также может помочь в точной обрезке компонентов из отвержденного углеродного волокна. Хотя инвестирование в станок с ЧПУ только для углеродного волокна может быть большим скачком, понимая его роль в производстве высококлассных Детали из углеродного волокна это ценно. Некоторые сервисы даже предлагают обработку углеродного волокна на станках с ЧПУ, если вы предоставите дизайн.
Работа с толстыми листами углеродного волокна для изготовления конструкционных элементов
Когда ваши проекты расширяются и включают в себя конструктивные элементы, такие как изготовленные на заказ батарейные блоки или стойки обтекателя, используя толстые листы углеродного волокна становится необходимым. Такие толстые ламинаты могут быть созданы с помощью множества слоев необработанные листы углеродного волокна или путем приобретения предварительно консолидированных пластин. Основной проблемой при работе с толстыми ламинатами является обеспечение полного насыщения смолой всех слоев при укладке. Воздушные пустоты могут сильно снизить прочность.
Управление экзотермой (теплом, выделяющимся во время отверждения) также становится более важным при использовании более толстых деталей. Слишком сильное нагревание может повредить смолу или даже углеродные волокна. Для очень значительных объемов могут потребоваться смолы с более медленным отверждением или поэтапные процессы отверждения. Детали из углеродного волокна. Тщательное планирование ориентации слоев также крайне важно для достижения желаемых характеристик прочности и жесткости в конструктивных элементах.
Безопасность превыше всего: работа с пылью и смолами из углеродного волокна
Мы уже упоминали о безопасности, однако ее невозможно переоценить, особенно при выполнении сложных работ. Пыль углеродного волокна раздражает кожу, глаза и легкие. Мелкие частицы воздуха из резка листа углеродного волокна или шлифовка могут быть неприятными. Всегда надевайте респиратор, перчатки и защиту для глаз. Работайте в хорошо проветриваемом помещении или на открытом воздухе, если это возможно.
Эпоксидные смолы также требуют осторожного обращения. Избегайте контакта с кожей, так как у некоторых людей со временем может развиться чувствительность. Обеспечьте хорошую вентиляцию при смешивании и нанесении смол, чтобы избежать вдыхания паров. И наконец, утилизируйте отходы, такие как обрезки смешанных смол и пыль углеродного волокна, в соответствии с местными правилами. Чистое и безопасное рабочее пространство приводит к лучшим результатам и защищает ваше здоровье.
Почему этот подход подходит любителям велосипедов на заказ
Так зачем же принимать вызов "сделай сам" из углеродного волокна для своего мотоцикла? Помимо ощутимых Детали из углеродного волокна Вы создаете то, что приносит большую пользу. Вы достигаете непревзойденной индивидуальности. Каждый изгиб, каждый размер могут быть выполнены в точном соответствии с вашим видением и конкретными потребностями вашего велосипеда. Такой уровень персонализации редко доступен в готовом виде.
Кроме того, создание собственных компонентов способствует более глубокой связи с мотоциклом. Вы больше не просто ездок, вы становитесь мастером. Развитие этих навыков приносит огромное удовлетворение. Кроме того, вы получаете доступ к невероятному спектру материалов из различных необработанные листы углеродного волокна к специализированным композитный лист из углеродного волокна продукты. Удовольствие от создания высокопроизводительных легких Детали из углеродного волокна которые улучшают как внешний вид, так и функциональность, очень велика. И давайте будем откровенны: потрясающая визуальная привлекательность настоящих настоящие листы углеродного волокна просто не имеет себе равных на любой пользовательской машине.
Устранение проблем, возникающих при создании деталей из углеродного волокна своими руками
Даже при тщательной работе вы можете столкнуться с несколькими трудностями на своем пути "сделай сам" из углеродного волокна. Знание распространенных проблем и их решений может избавить вас от разочарований. Вот некоторые типичные проблемы:
Пузырьки воздуха или пустоты: Они ослабляют вашу роль и выглядят непрофессионально.
- Решение: Улучшите технику смачивания, чтобы каждый пучок волокон был пропитан. Эффективнее использовать рифленый валик или скребок. Рассмотрите возможность использования вакуумных мешков в будущих проектах, так как это значительно сокращает количество пустот в материале. Детали из углеродного волокна.
Часть Придерживаясь формы: Кошмарный сценарий, который может повредить вашу деталь или пресс-форму.
- Решение: Проверьте подготовку формы. Нанесите несколько слоев разделительного воска, тщательно отполировав. Используйте надежный ПВА или другой разделительный состав в виде спрея. Убедитесь, что поверхность формы очень гладкая и непористая.
Хрупкость или липкость покрытия: Указывает на проблемы с отверждением смолы.
- Решение: Дважды проверьте соотношение смолы и отвердителя - оно должно быть точным. Обеспечьте тщательное перемешивание. Отверждайте деталь в рекомендованном температурном диапазоне в течение указанного времени. Старая смола или отвердитель также могут стать причиной проблем.
Сложность резки листа углеродного волокна: Это прочный материал.
- Решение: Используйте подходящие острые инструменты. Отрезные круги с алмазным напылением или заусенцы на Dremel или угловой шлифовальной машине хорошо подходят для затвердевших деталей. Специализированные ножницы могут справиться с незатвердевшими необработанные листы углеродного волокна. Не торопитесь и делайте рельефные разрезы на сложных формах. Не забывайте о средствах защиты, когда резка листа углеродного волокна материал.
Деформация или искажение: Деталь не держит заданную форму.
- Решение: Убедитесь, что деталь надежно закреплена в форме в течение всего процесса отверждения. Избегайте неравномерного нагрева во время отверждения. Для крупных деталей может потребоваться более прочная форма, чтобы предотвратить их изгиб. Иногда чередуйте направление плетения в ламинированный лист из углеродного волокна может помочь сбалансировать стресс.
Ваш мотоцикл ждет своих деталей из углеродного волокна
Создайте свой собственный DIY Детали из углеродного волокна Создание мотоцикла на заказ - бесспорно, очень полезное занятие. Оно сочетает в себе технические навыки и художественное самовыражение, позволяя создавать компоненты, которые одновременно невероятно легкие и визуально привлекательные. Хотя поначалу кривая обучения может показаться крутой, начав с более простых проектов, вы обретете уверенность и опыт.
Путешествие от обработки необработанные листы углеродного волокна и прикручивание готовой блестящей детали приносит невероятное удовольствие. Увеличение производительности за счет снижения веса и фактор крутизны углепластика на заказ оправдывают все усилия. Так что собирайте материалы и приступайте к процессу, и вскоре вы будете с гордостью демонстрировать свой собственный уникальный Детали из углеродного волокна на по-настоящему индивидуальный мотоцикл. Мотоцикл вашей мечты, созданный вашими собственными руками, находится в пределах досягаемости.
Один ответ